


Sign up for workout ideas, training advice, reviews of the latest gear and more.

Learning how to do a pull-up can feel intimidating, especially when you cannot yet lift your body even a few inches toward the bar. The good news is that a pull-up is not an exercise you either can or cannot do. It is a skill that can be developed through a smart sequence of strength exercises, assisted repetitions, controlled lowering movements, and consistent practice. The right pull-up progression for women breaks the movement into manageable stages so that every workout creates measurable improvement.
Women sometimes assume that pull-ups are out of reach because they generally begin with less upper-body muscle mass than men. That may affect the starting point, but it does not determine the outcome. Your back, shoulders, arms, grip, and core all respond to progressive strength training. With patient practice and appropriate exercise selection, many women can progress from hanging on the bar to completing a strong, unassisted pull-up.
This guide explains the muscles involved, the most effective progression exercises, a practical weekly training schedule, common mistakes, and ways to move through plateaus. Whether your goal is one strict pull-up or a full set, the same basic strategy applies: master each part of the movement, gradually reduce assistance, and train with excellent form.
The pull-up is one of the most effective upper-body compound exercises because it requires several muscle groups to work together. Your latissimus dorsi, commonly called the lats, provide much of the pulling power. The muscles of the upper and middle back help control your shoulder blades, while your biceps and forearms assist with bending the elbows and maintaining your grip. Your abdominal muscles, glutes, and deep core stabilize your body so that energy is directed upward instead of being lost through swinging.
This combination makes pull-ups useful for much more than building an athletic-looking back. Strong pulling muscles support better posture, help balance pressing exercises, and make many everyday movements easier. Pull-up training can also improve grip strength, shoulder control, and confidence with bodyweight exercise. Because the movement is easy to measure, it offers a satisfying long-term goal: a longer hang, a slower negative, less assistance, or another full repetition all demonstrate genuine progress.
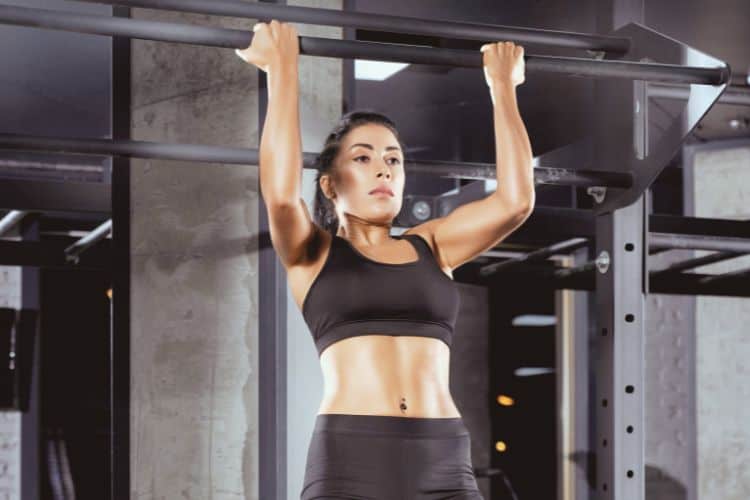
Before starting the progression, understand the final skill. Stand beneath a secure bar and take an overhand grip slightly wider than shoulder width. Wrap your thumbs around the bar for a firm, safe hold. Begin in a dead hang with straight arms, then gently draw your shoulder blades down instead of letting your shoulders crowd your ears.
Brace your abdomen as though preparing for a light punch, squeeze your glutes, and keep your legs quiet. Pull your elbows down toward your sides while lifting your chest toward the bar. Continue until your chin clearly passes the bar without craning your neck. Lower under control until your elbows are straight, maintaining shoulder awareness at the bottom. A strict repetition does not require kicking, swinging, or reaching the chin forward.
You do not need to force an exaggerated chest-to-bar position. A comfortable overhand grip and a controlled chin-over-bar finish are appropriate for most recreational lifters. If an overhand grip is currently too difficult, an underhand chin-up or neutral-grip pull-up can help build strength. These versions often feel more accessible because the arms can contribute more, but they should complement rather than completely replace practice for your chosen pull-up variation.
Grip is your connection to the bar. If your hands fatigue immediately, your back never gets a fair chance to work. Begin by standing on a box or bench beneath the bar and holding it while keeping some weight through your feet. Gradually bend your knees or lift one foot so your hands support more of your weight. Keep your ribs stacked over your hips and avoid painfully sinking into the shoulders.
Perform three or four holds of 15 to 30 seconds. As your grip improves, progress to full dead hangs. Chalk can help if sweaty hands are the problem, but grip strength should still be trained rather than avoided with straps. Stop a hang if you experience sharp shoulder pain, numbness, or tingling.
Scapular pull-ups teach the first action of a good pull-up. Hang with straight elbows and a braced core. Without bending your arms, pull your shoulder blades down and slightly together so your body rises an inch or two. Pause briefly, then return to the starting position with control.
The movement is small, and that is exactly the point. Do not turn it into a partial arm pull or swing your legs for momentum. Aim for three sets of five to eight repetitions. Once you can complete eight controlled reps, you should feel more stable at the bottom of assisted and unassisted attempts.
Inverted rows and dumbbell rows build the back and arm strength needed for pull-ups without requiring you to lift your full body weight vertically. For an inverted row, position a bar in a rack, grip it, and walk your feet forward until your body forms a straight line. Pull your chest toward the bar while keeping your hips from sagging. A more upright body position is easier; moving the feet forward or elevating them increases the challenge.
One-arm dumbbell rows are also valuable because they allow progressive loading and help correct side-to-side differences. Pull the weight toward your hip rather than shrugging it toward your shoulder. Perform three sets of eight to 12 repetitions per side. Increase the weight when you can finish the top end of the range without twisting your torso.
The lat pulldown resembles the vertical pulling pattern of a pull-up and makes the resistance easy to adjust. Use an overhand grip and initiate the movement by drawing your shoulders down before bending the elbows. Pull the bar toward your upper chest without leaning far backward. Return it slowly until your arms are straight.
If you train at home, anchor a resistance band securely overhead and perform kneeling band pulldowns. Keep tension on the band throughout the set and focus on bringing your elbows toward your ribs. Complete three sets of eight to 12 reps. The goal is not to chase a large weight at the expense of range of motion; it is to strengthen the correct movement pattern.
Flexed-arm holds strengthen the top of the pull-up, where many beginners struggle to keep the chin over the bar. Step onto a stable box and use your legs to reach the top position. Hold with your chin above the bar, shoulder blades controlled, and core tight. Do not rest your chin on the bar or hold your breath.
Begin with three holds of five to 10 seconds. Build toward 15 to 20 seconds before making the exercise harder. You can also pause at different points during the lowering phase to strengthen specific sticking points.
Negative pull-ups emphasize the eccentric, or lowering, part of the exercise. Your muscles can resist more force eccentrically than they can lift concentrically, which makes negatives an effective bridge to a full repetition. Step or jump carefully into the top position, then lower for three to eight seconds until your arms are straight.
Use a box so you do not waste energy jumping repeatedly. Perform two to four sets of two or three negatives, resting at least 90 seconds between sets. Quality matters more than quantity. End the set when you can no longer control the descent. Excessive negatives can create significant soreness, particularly in the biceps and lats, so avoid doing large numbers every day.
Assisted pull-ups let you practice the complete movement. A machine provides consistent support and makes progress easy to track. Choose enough assistance to perform four to eight clean repetitions. As you grow stronger, reduce the assistance in small increments while preserving form.
Resistance bands can also help, but their assistance changes throughout the repetition. They provide the most help at the bottom and less near the top, which may not match your natural sticking point. Loop the band securely around the bar and place a knee or foot inside it with care. Thinner bands offer less assistance. Avoid snapping into the bottom or allowing the band to control your speed.
A partner can support your feet or lower legs, but the amount of help is harder to measure. Whichever method you use, think of assistance as a temporary training tool. Gradually reduce it instead of endlessly adding repetitions with the same heavy band.
Once assisted reps and negatives feel strong, use controlled partial repetitions to practice moving your own body weight. From a box, begin near the top and lower halfway before pulling back up. You can also initiate from the bottom and pull as high as possible while maintaining form. Over time, expand the range until the upper and lower portions meet.
Partials should be deliberate, not frantic attempts. Complete two or three sets of two to five reps. Combine them with full-range assisted work so you continue practicing the complete path.
Try unassisted repetitions near the beginning of a workout, after warming up but before fatigue. Take your grip, set your shoulders, brace your body, and pull with commitment. Imagine driving your elbows toward your back pockets instead of trying to lift your chin. If you stall, maintain tension for a moment, but stop before form turns into uncontrolled kicking.
Limit yourself to three to five high-quality attempts with generous rest. Repeated failures can add fatigue without useful training volume. After the attempts, complete assisted pull-ups and accessory exercises. When your first repetition arrives, continue practicing singles rather than testing your maximum every session.
This schedule provides frequent practice without training the same tissues hard on consecutive days. Leave at least one day between sessions when possible.
Begin with three strict attempts or three sets of one to three lightly assisted reps. Then perform three sets of four to eight assisted pull-ups, three sets of eight to 10 one-arm dumbbell rows per side, and three sets of five to eight scapular pull-ups. Finish with two or three dead hangs of 20 to 40 seconds. Rest two minutes after demanding pull-up sets and 60 to 90 seconds after accessory work.
Start with three sets of two slow negative pull-ups, aiming for a five- to eight-second descent. Follow with three sets of eight to 12 lat pulldowns or band pulldowns, three sets of eight to 12 inverted rows, and three flexed-arm holds. Add two sets of 10 to 15 face pulls or band pull-aparts to train the rear shoulders and upper back.
Perform four sets of three to six assisted pull-ups using slightly more help than on Day 1. Every rep should look consistent. Continue with three sets of two to five partial pull-ups, two or three sets of hammer curls, and two sets of hanging knee raises or dead bugs for core control. End with an easy supported hang rather than a maximal grip test.
If three sessions are too much, use Day 1 and Day 2 on alternating weeks or combine a few elements into two balanced workouts. Consistency matters more than squeezing every exercise into the schedule.
Progressive overload means gradually making training more challenging as your body adapts. In pull-up training, progress is not limited to adding weight. You can use less assistance, perform an extra clean repetition, increase a hang by five seconds, slow the negative, expand a partial rep’s range, or improve technique with the same workload.
Change only one main variable at a time. For example, if you complete three sets of eight band-assisted pull-ups with excellent form, move to a slightly lighter band and accept that your reps may temporarily fall to four or five. If your negative lasts three seconds, work toward five seconds before adding more repetitions. Small, measurable steps reduce frustration and keep your joints comfortable.
Track your grip, assistance level, sets, reps, and lowering time in a notebook or app. Progress can be difficult to notice from workout to workout, but four weeks of records often reveal meaningful gains.
Attempting a maximum pull-up every day can exhaust the muscles and irritate the elbows without providing enough productive volume. Skill practice works best when most repetitions are controlled. Keep one or two good reps in reserve on assisted sets and save all-out tests for occasional checkpoints.
A very thick band may launch you out of the bottom while doing little to strengthen the top. Use the lightest assistance that allows complete, smooth repetitions. Machine assistance or foot-supported pull-ups can be easier to adjust precisely.
Starting every rep with shrugged shoulders makes it difficult to transfer force and may feel uncomfortable. Practice active hangs and scapular pull-ups so that shoulder-blade control becomes automatic. Do not force the shoulders unnaturally far down; aim for stable, comfortable engagement.
Kipping pull-ups are a separate athletic skill, not a shortcut for building a strict pull-up. Keep the ribs, pelvis, and legs controlled. If you swing after stepping off the box, wait until your body becomes still before beginning the repetition.
Pull-up muscles grow stronger between workouts. Allow roughly 48 hours between demanding sessions, eat adequate protein and total calories, and prioritize sleep. If your elbows or shoulders ache beyond normal muscle soreness, reduce volume and review your technique.
The timeline varies widely. A woman who already strength trains and can complete controlled negatives may achieve a pull-up within several weeks. A complete beginner may need several months to build grip, back strength, technique, and confidence. Body weight, training history, schedule, recovery, and access to equipment all influence the process.
Avoid comparing your timeline with someone else’s highlight reel. Focus on performance markers that predict success: longer hangs, cleaner scapular reps, slower negatives, lighter assistance, and stronger rows. These improvements show that the plan is working even before your chin clears the bar.
If progress stalls for three or four weeks, review your recovery and training volume. You may need a lighter week, more upper-back strength work, or more practice at the exact portion where you fail. Sometimes the solution is not more effort but better-targeted effort.
Once you complete one strict rep, build consistency before chasing a high maximum. Perform several singles with two or three minutes of rest, stopping before failure. When those singles become reliable, use small clusters such as two reps, rest briefly, then one more rep. Continue assisted sets afterward to accumulate enough volume for muscle growth.
A practical goal is to increase your weekly total of strict repetitions gradually. You might complete three singles in the first week, four or five the next, and eventually begin performing sets of two. When you can complete five to eight clean pull-ups, weighted pull-ups can become an option, but they are never required for a strong, capable upper body.
The most effective pull-up progression for women is built on patience, specific practice, and gradual overload. Start with the stage that matches your current strength rather than rushing to repeated unassisted attempts. Develop your grip, learn to control your shoulder blades, strengthen your back with rows and pulldowns, and use holds, negatives, and assisted repetitions to close the gap.
Train two or three times per week, record the details, and celebrate improvements that occur before the first full repetition. A five-second negative, a lighter resistance band, or a longer active hang is evidence that you are moving forward. With steady training and good recovery, the pull-up changes from an intimidating test into a skill you have systematically earned.
To continue building the strength needed for your first pull-up, explore the Best Back And Bicep Compound Exercises for movements such as lat pulldowns that support vertical pulling strength. Add the 10 Best Dumbbell Back Workouts For Women to strengthen your lats, upper back, and arms. You can also improve your bodyweight control with this 30 Day Calisthenics Workout Plan For Women or follow the 7 Day Calisthenics Routine For Strength And Mobility for a balanced weekly schedule. For additional compound training, include these Full Body Strength Training Plan for Women Over 40 to develop the core stability, grip strength, and total-body control needed for stronger pull-ups.
Stay up to date on the latest women’s health, fitness and lifestyle trends and tips.
