


Sign up for workout ideas, training advice, reviews of the latest gear and more.

A kettlebell offset-load strength workout adds a new challenge to familiar exercises by placing weight on one side of your body. Instead of holding matching weights in both hands, you perform movements with a single kettlebell beside your leg, at your shoulder, or in one hand while the other remains unloaded. Your legs, upper body, and trunk must coordinate to move the weight while controlling your position.
For women who train at home, this approach makes one kettlebell a versatile strength tool. You can squat, hinge, press, row, and carry without filling a room with equipment. The goal is controlled strength: complete deliberate repetitions, recover between sets, and gradually increase the challenge as your technique improves.
This guide explains offset loading, outlines a complete workout, and provides a practical four-week progression. Whether you are expanding a basic kettlebell routine or looking for a different full-body session, the exercises below offer a structured place to start.
Offset loading means that resistance is distributed unevenly relative to your body. A suitcase carry is a straightforward example: one hand holds a kettlebell while the other hand stays empty. The weight creates a sideways pull, and you work to walk without collapsing toward it or leaning away.
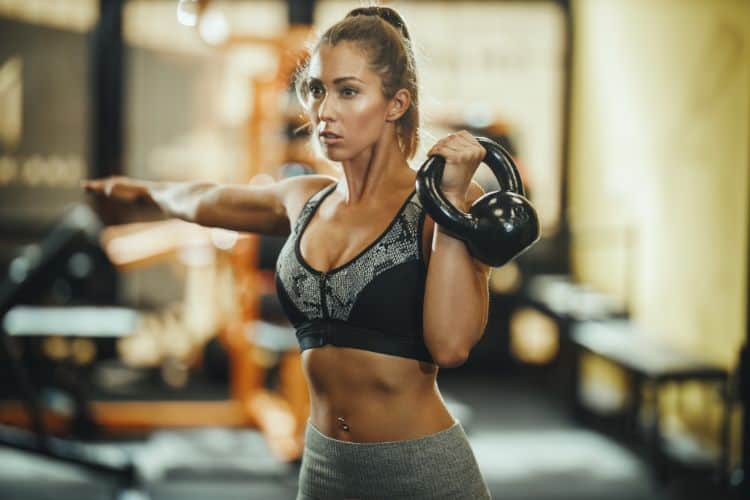
A single front-rack squat creates a different challenge. The kettlebell rests at one shoulder as you bend and straighten both legs. Your trunk helps manage the uneven load while your legs perform the squat. Offset loading changes the demands of a movement without requiring an unstable surface or complicated exercise combination.
An offset exercise does not have to be performed on one leg. Both feet remain planted during the suitcase deadlift and front-rack squat in this workout. Conversely, a bodyweight single-leg squat is unilateral lower-body training without an external offset load.
The distinction matters when choosing an appropriate challenge. Keeping both feet grounded allows you to practice managing uneven resistance before adding the balance demands of single-leg exercises. Progress one variable at a time so you can tell whether the weight, movement, or balance requirement needs adjustment.
A single bell can challenge several movement patterns because each exercise has different strength requirements. You might comfortably deadlift a weight that is too heavy to press overhead. The equipment is simple, but the load still needs to match the movement.
If you own one kettlebell, use it only for exercises you can perform with control. Substitute an unloaded movement when necessary. Owning one weight does not mean you must force that weight into every exercise, especially overhead pressing.
Offset loading gives your trunk a job beyond repeatedly bending or twisting. During a carry, you resist excessive side bending. During a row, you control unwanted rotation. During a rack squat, you maintain a manageable relationship between your ribs and pelvis as your legs move.
These are useful ways to train trunk control alongside larger strength exercises. However, needing to stabilize a load does not automatically make an exercise superior to a balanced alternative. Offset training is one option within a varied strength program.
Single-arm exercises let you observe how each side performs. One arm might fatigue sooner during rows, or one rack position might feel less comfortable. These observations can help guide load selection and technique practice, but they do not diagnose an injury or prove that an imbalance needs correcting.
Start with the side that feels less capable and match its clean repetitions on the other side. Keep the prescribed work equal unless a qualified professional has recommended a different approach for your individual situation.
A workout can become more challenging through load placement, range of motion, or repetition quality. You do not need to turn every kettlebell session into fast circuits. Offset strength training works well when you take enough rest to repeat good technique.
This makes it a useful option for women who enjoy deliberate training or prefer exercises without jumping. Low impact still requires effort, and the appropriate intensity depends on your experience, exercise selection, and recovery.
You need a kettlebell, supportive footwear or another secure training setup, and enough clear space to move safely. A sturdy bench or counter can support the rowing exercise. For carries, use a clear walking route; if space is limited, perform a stationary hold instead.
The full session takes approximately 35–45 minutes, including the warm-up and cooldown. Your exact time depends on rest periods and transitions. Perform the workout twice weekly on nonconsecutive days initially, adjusting around other strength sessions and recovery needs.
Select a load that allows you to finish a set with approximately two or three good repetitions remaining. This is often described as two or three reps in reserve. You should feel challenged near the end while still controlling your posture, grip, and movement path.
Use separate weights for different exercises when available. A deadlift and carry may tolerate more load than a press. If your kettlebell causes you to twist, lean excessively, or shorten the movement unintentionally, reduce the weight or choose the listed regression.
Perform the exercises as straight sets rather than a timed circuit. Complete both sides of one exercise, rest, and repeat before moving on. Allow approximately 15–30 seconds to change sides and 60–90 seconds after completing both sides. Take up to two minutes when needed.
The standard session uses three sets of suitcase deadlifts, front-rack squats, and supported rows. Follow those with two sets of half-kneeling presses and suitcase carries. Beginners can start with two sets throughout and omit the press until the setup feels familiar.
Spend six to eight minutes preparing the movements you will use. Start with easy marching or walking until you feel warmer. Follow with comfortable shoulder circles and several slow breaths, allowing your ribs to expand without forcing your chest upward.
Next, perform eight bodyweight hip hinges, eight controlled squats, and five supported reverse steps per side. The reverse steps simply rehearse changing stance and controlling your balance; they are not loaded working sets. Finish with a light suitcase hold for 15–20 seconds on each side.
Practice bringing a light kettlebell into the rack using both hands. Keep the bell close to your body and let it rest against the forearm and upper arm without bending the wrist backward. You do not need to perform a kettlebell clean for this workout.
For the hinge, send your hips backward while maintaining soft knees and a comfortable back position. If reaching the floor makes you round or strain, elevate the bell on a stable, suitable platform. Use a setup that cannot shift or tip under the load.
Perform three sets of six to eight repetitions per side. Place the kettlebell beside one foot, approximately in line with your midfoot. Stand with your feet about hip-width apart, hinge backward, bend your knees as needed, and grasp the handle securely.
Brace your trunk, keep the loaded arm long, and push through your feet to stand. Finish tall without leaning backward or shrugging. Lower the kettlebell along the same path, returning it to the floor under control before beginning the next repetition.
Keep your chest and pelvis generally facing forward. The uneven weight may tempt you to rotate or shift strongly to one side. Reduce the load or elevate the starting position if you cannot maintain a repeatable movement.
Complete the prescribed repetitions with one hand before switching sides. Although both legs work during each set, the trunk and grip challenge changes with the loaded hand. Treat the two sides as parts of one set and recover before repeating them.
Perform three sets of six to eight repetitions with the kettlebell racked on each side. Bring the bell to one shoulder using both hands. Set your feet at a comfortable width and keep your free hand relaxed or slightly extended for balance.
Bend your knees and hips together, lowering into a squat you can control. Keep your feet grounded and let your knees follow the direction of your toes. Stand by pushing through the floor, maintaining the rack position without twisting your shoulders.
Your depth should reflect your mobility and ability to manage the weight. A chair or box can provide a consistent target, provided it is stable. Touch it lightly if useful, then stand without dropping onto the seat or rocking forward.
If the single rack feels awkward, practice with a lighter bell. A two-handed goblet squat is another regression while you learn the squat pattern, although it removes much of the offset demand. Build confidence before returning to the single rack.
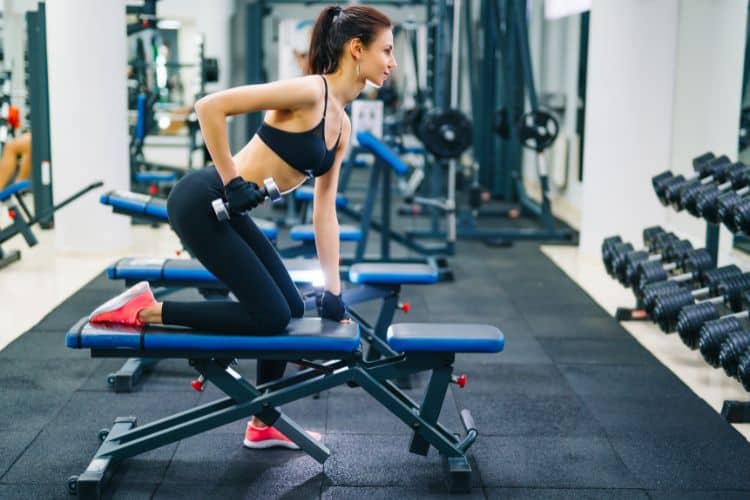
Perform three sets of eight to ten repetitions per arm. Place your free hand on a sturdy bench or counter and step into a comfortable split stance. Hinge forward, keeping your torso steady and enough clearance for the kettlebell.
Pull the bell toward your hip, allowing your elbow to travel backward without aggressively shrugging. Lower until your arm is long again, maintaining control. Keep the weight close enough that the movement feels like a row rather than a swinging arc.
The support helps you focus on pulling while controlling torso rotation. Avoid turning your chest upward to lift the kettlebell higher. Use a manageable range of motion, and stop the set when you need momentum to complete repetitions.
Switch your support hand and stance for the other arm. Match the same load and clean repetition count. If you do not have a stable support surface, use a light split-stance row with your free forearm resting on your forward thigh.
Perform two sets of five to eight repetitions per side. For a right-arm press, place your right knee on a padded surface and your left foot in front. Keep some width between your legs instead of balancing on a tightrope.
Start with the kettlebell securely racked. Press overhead through a comfortable path while keeping your trunk controlled. Allow your shoulder blade to move naturally as the arm rises. Lower slowly to the rack without letting the weight pull your wrist backward.
Avoid leaning sideways or extending your lower back to finish the repetition. If you cannot raise the bell with control, use a lighter weight. Half-kneeling should feel stable; if kneeling is uncomfortable, a supported seated position may work better.
Overhead pressing is optional. Substitute a single-arm kettlebell floor press for the same sets and repetitions when overhead movement is unsuitable but floor pressing feels comfortable. Use both hands to position and remove the bell safely, and keep your free hand available to assist.
Perform two carries of 20–40 seconds per side. Pick up the kettlebell with a controlled hinge, then walk at an easy, deliberate pace. Keep your arm long, shoulders comfortable, and steps consistent while looking ahead.
Aim to remain generally upright without forcing a rigid posture. Avoid leaning away from the weight to create the appearance of balance. Turn slowly with several small steps, giving the bell enough clearance from your legs and surrounding objects.
End the carry before your grip begins opening or your posture deteriorates. Set the bell down with control, then change sides. Start at the shorter end of the time range and extend the duration only when your walking remains steady.
If your space is limited, hold the kettlebell beside you while standing for 15–30 seconds per side. A stationary hold retains the uneven loading challenge while removing the need to walk around furniture or make repeated tight turns.
Begin with two sets of every exercise, even if you have prior training experience. Use the lower end of each repetition range and leave approximately three repetitions in reserve. Keep carries short enough that you can put the bell down without rushing.
Record the weight, repetitions, and any setup adjustments. Useful notes include the height of an elevated deadlift, the squat target, and whether you used the press substitution. These details make the next session easier to compare accurately.
If the first week felt manageable and you have recovered well, increase deadlifts, squats, and rows to three sets. Keep presses and carries at two sets. Maintain your starting weight while you adjust to the additional work.
You can remain at two sets longer if needed. Progression does not have to follow a deadline. A repeatable session that fits your recovery is more useful than adding volume simply because the calendar says to do so.
Gradually add repetitions while preserving the same technique and effort target. For example, move your squat sets from six repetitions per side toward eight. You do not need to add a repetition to every set in one workout.
For carries, increase duration in small steps toward 40 seconds. Increase either lifting repetitions or carry duration where appropriate, without simultaneously increasing every training variable. Keep rest periods long enough to support the quality of your sets.
When you reach the upper end of an exercise’s range on every set with two or three repetitions remaining, consider the next manageable kettlebell. Return to the lower end of the range after increasing the weight.
If the next bell represents too large a jump, stay with your current load. You can continue practicing consistent depth, smoother lowering, or a brief pause in a stable position. These changes add challenge, but eventually heavier equipment may be needed for continued load progression.
Grip fatigue is part of carrying and rowing, but the handle must stay secure. Continuing until your fingers peel open creates an unnecessary risk of dropping the bell. Stop with enough control to return the weight safely.
Keep hands dry and clear the surrounding floor. If grip consistently limits another exercise, reduce the load or shorten the set. Additional grip work can be introduced separately after you establish a manageable baseline.
Changing sides deserves the same attention as performing a repetition. Set the bell down and reposition yourself instead of passing a heavy kettlebell around your body while tired. Use both hands to move it into or out of the rack.
Take a few extra seconds when needed. A strength workout does not lose its value because transitions are deliberate. Those seconds help you begin the next side in a stable position.
Small differences in coordination or perceived effort are common. Record them without automatically adding extra sets to the less comfortable side. Fatigue, familiarity, stance, and the support surface can all influence how a movement feels.
A persistent or painful change deserves individual assessment rather than an aggressive correction plan. Stop an exercise that causes sharp, radiating, or increasing pain, and choose a comfortable alternative while seeking appropriate guidance if symptoms persist.
Start with two sets, lighter weights, and the shorter carry duration. Practice rack holds before rack squats, and use a chair target if it improves consistency. You can divide the session into fewer exercises while learning the positions.
A beginner session might include suitcase deadlifts, supported rows, goblet squats, and suitcase holds. Introduce the single rack and pressing gradually. The goal is to develop control you can repeat across sessions.
Experienced lifters can use heavier loads within the same repetition ranges, provided transitions and technique remain secure. Keep offset work alongside balanced strength exercises to maintain variety in loading and movement practice.
Avoid adding instability simply to make the workout feel advanced. A heavier, well-controlled carry or squat can provide a substantial challenge without standing on one leg or combining several exercises into an awkward sequence.
Place the workout on two nonconsecutive days, such as Monday and Thursday. Easy walking or comfortable mobility work can fit between sessions. If you already follow a strength program, replace a comparable session rather than automatically adding more work.
Support training with regular meals, adequate fluids, and consistent sleep. Monitor your ability to repeat the workout with good technique. If performance declines across several sessions, reduce sets or load temporarily and review your overall training demands.
It can be, when the exercise selection and load suit the individual. Age alone does not determine the correct kettlebell weight. Training history, comfort, balance, and recovery are more useful starting points for adjusting this workout.
It trains trunk control during lifting and carrying, but it does not have to replace every other core exercise. You can include movements such as dead bugs or side planks elsewhere in your week when they fit your goals and recovery.
For this general workout, use the same sets, weight, and clean repetitions on each side. Begin with the less capable side and match it. Individual rehabilitation needs may require a different plan developed with a qualified professional.
A kettlebell offset-load strength workout offers a practical way to train your legs, back, shoulders, grip, and trunk with limited equipment. Its value comes from matching the weight to the movement and controlling each repetition, transition, and carry.
Start with manageable loads, practice both sides, and record your results. Add sets, repetitions, or weight when you can do so with confidence. Consistent practice gives this simple one-kettlebell workout room to grow alongside your strength.
To complement your kettlebell offset-load strength workout, explore our Kettlebell Suitcase Carry Workout for more practice managing one-sided resistance, and review these Kettlebell Deadlift Variations for additional hip-hinge options. Refine your squat technique with our Kettlebell Goblet Squat Workout, discover complementary Kettlebell Core Exercises For Women, or explore our 30-Minute Full-Body Kettlebell Workout For Beginners for another structured training option.
Stay up to date on the latest women’s health, fitness and lifestyle trends and tips.
