


Sign up for workout ideas, training advice, reviews of the latest gear and more.

A 30-minute upper-lower superset workout gives you a practical way to train your entire body when your schedule is tight. By pairing a lower-body exercise with an upper-body movement, you can organize useful strength work into a short session without turning every repetition into a race. Your legs work, your upper body follows, and planned recovery helps you maintain control throughout the workout.
This dumbbell routine combines squats, presses, hip hinges, rows, lunges, and shoulder work. Together, these movements challenge major muscle groups while giving you a repeatable structure you can adjust as you become stronger. You can perform the session at home or in the gym with a small selection of dumbbells, a mat, and enough space to move comfortably.
The complete session includes a five-minute warm-up, three seven-minute supersets, and a four-minute cooldown. You will alternate lower-body and upper-body exercises within each superset, completing three rounds before moving to the next pair. The goal is purposeful strength training: controlled repetitions, appropriate weights, and enough recovery to make the next set productive.
An upper-lower superset pairs one exercise for the lower body with one exercise for the upper body. For example, you might complete a set of goblet squats and then perform dumbbell floor presses. After the second movement, you rest before repeating the pair.
This arrangement differs from pairing two exercises that heavily fatigue the same muscle group. Alternating regions gives the primary muscles from the first exercise some recovery while another region works. However, your heart, breathing, grip, and trunk may still be working across both movements. An upper-lower pairing does not eliminate the need for rest.
Each seven-minute block contains three rounds of the same exercise pair. Start each round at the beginning of its assigned two-minute window. Complete the lower-body set, take a short transition, perform the upper-body set, and rest for the remainder of that window. The seventh minute provides additional recovery and time to prepare for the next block.
For example, in the first block, start rounds at minutes five, seven, and nine. Use minute eleven to recover and change equipment. This format creates a predictable schedule while allowing you to finish your repetitions without filling every second with exercise.
A full-body superset workout can make strength training easier to fit into ordinary life. Its main advantage is organization: you know which exercises to perform, how many rounds to complete, and when the session ends. A realistic plan is easier to repeat than a complicated routine that regularly exceeds your available time.
This workout includes a squat, a hip hinge, and a split-stance leg exercise, alongside horizontal pushing, rowing, and overhead pressing. These patterns provide a broad strength-training foundation. Your trunk also works to control your position during standing movements, although this routine is not a complete substitute for every type of core training.
Alternating upper and lower body can reduce some of the idle time between sets. You still rest deliberately, but you organize that recovery around different movements. This makes supersets useful when you want a focused session without adding extra exercises simply to feel busy.
Repeating the same workout makes progress easier to recognize. You can compare the weights, repetitions, range of motion, and effort you used across sessions. Progress might mean completing eight cleaner squats, pressing a slightly heavier dumbbell, or finishing the same workload with more control.
You need dumbbells and a comfortable floor surface. Ideally, keep a heavier pair available for lower-body exercises and a lighter pair for presses. One moderate pair can still work, but you may need different repetitions or exercise variations to match your strength.
A sturdy chair or countertop can provide balance support during split squats. If you use furniture, check that it cannot slide or tip. Clear enough space to lower your weights safely, and place the dumbbells where you can reach them without stepping around obstacles.
Select a weight that allows you to finish each set with approximately two or three good repetitions still available. This is often described as leaving two or three repetitions in reserve. The final repetition should require effort while looking similar to the first.
Because estimating effort takes practice, begin conservatively. Reduce the load if you cannot control the lowering phase, breathe comfortably between repetitions, or maintain your intended position. Increase the challenge only when the current version consistently feels manageable.
Your squat weight does not need to match your shoulder-press weight. Many people can handle substantially more weight with their legs than with an overhead movement. Choose loads by exercise, and avoid letting the size of your available dumbbells dictate poor technique.
Use minutes zero through five for the warm-up. From minutes five through twelve, alternate goblet squats and dumbbell floor presses. From minutes twelve through nineteen, alternate dumbbell Romanian deadlifts and supported one-arm rows. From minutes nineteen through twenty-six, alternate split squats and dumbbell overhead presses. Finish with four minutes of easy movement and gentle mobility.
Within each seven-minute block, complete three two-minute rounds followed by one minute of recovery and setup. In each round, perform the first exercise, transition for roughly ten to fifteen seconds, perform the second exercise, and rest until the next round begins.
The repetition targets are flexible boundaries. If a set takes longer than expected, reduce repetitions, use an easier variation, or extend your recovery by skipping the next scheduled round. Never speed up your lifting simply to catch the timer.
A warm-up should help you rehearse the movements you are about to perform. Begin easily and gradually increase your movement range. You should finish feeling prepared to lift, with your breathing slightly elevated and your joints moving comfortably.
March in place or walk around your training area. Add relaxed arm swings and gentle shoulder circles. Gradually increase your pace without trying to create fatigue. Keep your steps comfortable and allow your breathing to settle into a natural rhythm.
Perform slow bodyweight squats, pausing briefly in a comfortable bottom position. Keep your feet planted and allow your knees to move in the same direction as your toes. If needed, squat toward a sturdy chair to establish a consistent depth.
Place your hands on your hips and soften your knees. Push your hips backward while keeping your spine in a comfortable, steady position. Stand by pressing through your feet and bringing your hips forward. Rehearse the movement without reaching toward the floor.
Step into a split stance and perform a few shallow split squats on each side. Use support if balance feels uncertain. Find a stance wide enough from side to side that you feel stable, rather than positioning your feet on one narrow line.
Practice a few light rows and presses with minimal resistance. Rehearse lowering onto the mat and standing back up safely. If an exercise still feels unfamiliar, spend extra time practicing and shorten the main workout accordingly.
The first pairing combines a knee-dominant lower-body movement with an upper-body push. Complete three rounds during minutes five through eleven, then use minute eleven through twelve for additional recovery and preparation.
Hold one dumbbell vertically near your chest, with your elbows pointing generally downward. Stand with your feet around shoulder width apart, adjusting the position until it feels natural. Brace your trunk gently and lower by bending your hips and knees together.
Descend only as far as you can maintain a stable foot position and comfortable control. Press through your feet to stand, keeping the dumbbell close to your body. Let your knees travel naturally with your toes instead of forcing them to remain behind your feet.
Use a controlled descent of roughly two seconds and a smooth return to standing. If the dumbbell pulls your chest forward, lighten it. Beginners can perform bodyweight squats or controlled chair squats while building confidence.
Sit on the mat with the dumbbells close to your thighs, then lower yourself carefully onto your back. Bend your knees and place your feet on the floor. Start with the weights above your chest and your palms facing forward or slightly inward.
Lower your upper arms until they gently contact the floor, keeping your elbows at a comfortable angle from your torso. Press the weights upward without bouncing your arms or clashing the dumbbells together. Keep your wrists stacked over your forearms.
The floor limits how far your upper arms travel behind your body. Use that boundary to maintain control, without treating floor contact as permission to relax completely. If getting onto the floor is difficult, substitute incline push-ups against a secure countertop.
After the press, place the weights down safely and return to standing without rushing. Rest until the next two-minute round begins. If the transition repeatedly consumes your recovery time, use fewer repetitions or choose the standing incline-push-up variation.
This pairing emphasizes the hips, hamstrings, and upper back. Start rounds at minutes twelve, fourteen, and sixteen. Use minute eighteen through nineteen to recover and prepare for the final block.
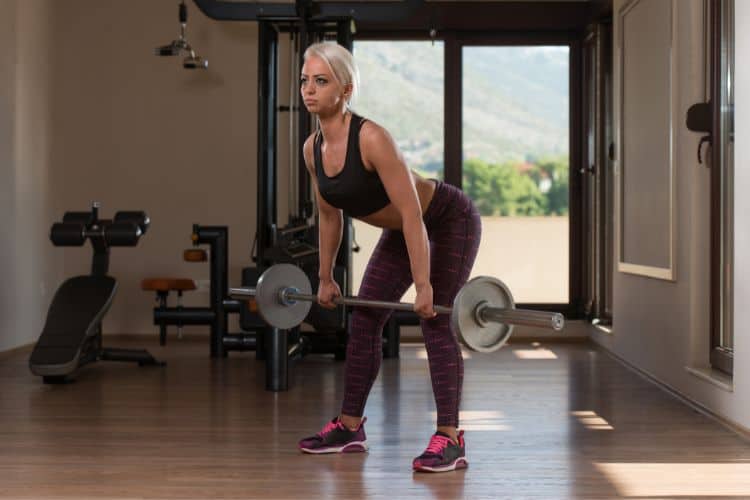
Stand with your feet around hip width apart and hold the dumbbells in front of your thighs. Keep a slight bend in your knees. Move your hips backward while letting the weights travel close to your legs.
Lower until you feel a manageable stretch through the back of your thighs or until you reach the limit of your controlled hip hinge. The dumbbells may stop around knee level or below it. Their height depends on your mobility and proportions; touching the floor is unnecessary.
Press through your feet and bring your hips forward to stand. Finish upright without leaning backward. Keep your neck aligned comfortably with your torso and avoid lifting your chin as the weights descend.
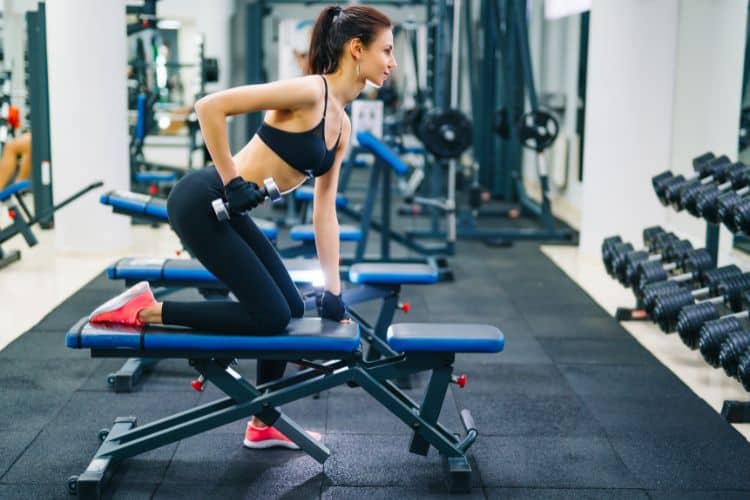
Place one hand on a secure countertop or sturdy bench and step into a stable stance. Hold a dumbbell in the opposite hand, allowing the arm to hang below your shoulder. Keep your trunk steady and your shoulders roughly level.
Pull the weight toward your hip, allowing your elbow to travel alongside your body. Lower slowly until your arm extends comfortably. Complete six to eight repetitions, then change sides with control.
Choose support that allows you to maintain your position without twisting or reaching. The row should come primarily from moving your arm and shoulder blade, rather than rotating your whole torso to lift the weight.
Both movements require you to hold dumbbells, so your hands may tire before your larger muscles do. Put the weights down during recovery. If your grip becomes unreliable, reduce the load or repetitions rather than continuing with slipping dumbbells.
The final block combines a split-stance leg movement with a vertical upper-body push. Start rounds at minutes nineteen, twenty-one, and twenty-three. Use minute twenty-five through twenty-six for recovery before beginning the cooldown.
Stand in a split stance with one foot forward and the other behind you. Keep enough space between your feet from side to side to feel stable. Hold dumbbells at your sides, or begin with bodyweight and one hand on support.
Bend both knees and lower straight downward through a comfortable range. Keep most of your attention on controlling the front leg while the rear leg assists with balance. Push through your feet to return to the starting position without changing your stance.
Complete six repetitions before switching sides. A shallow, supported split squat is a useful starting point. If the movement remains uncomfortable, replace it with eight controlled chair squats for that round.
Hold light dumbbells near shoulder height with your palms facing forward or slightly inward. Stand with your feet comfortably apart. Keep your ribs positioned over your pelvis and gently engage your trunk.
Press upward through a comfortable range, allowing your shoulder blades to move naturally. Lower the dumbbells slowly toward your shoulders. Avoid leaning backward to move weights that exceed your current pressing strength.
If overhead pressing causes discomfort, substitute the floor press or countertop push-up used earlier. A comfortable movement you can control is more useful than forcing an overhead position. You can also perform a light seated press on a stable, back-supported chair if that position feels better.
The last block may feel harder because fatigue has accumulated. Reduce the weight before compensating with shortened, rushed repetitions. Finish with a few repetitions in reserve and enough energy to put your equipment away safely.
Spend the first minute walking slowly and letting your breathing settle. During the next three minutes, move through gentle calf, hip, chest, and upper-back mobility. Choose positions that feel comfortable and hold them without bouncing.
You might use a short split stance for a calf stretch, a supported standing hip-flexor stretch, and relaxed shoulder movements. Keep the intensity mild. The cooldown provides a gradual transition out of exercise; it does not need to become another demanding training block.
The same workout structure can accommodate different experience levels. Keep the movement patterns recognizable while adjusting resistance, repetitions, support, or total sets. Change one or two factors at a time so you can identify what helps.
Begin with six to eight repetitions for the bilateral exercises and four to six per side for rows and split squats. Use light weights and stable support. You may complete only two rounds within each seven-minute block, using the extra time to recover and rehearse technique.
Keep this version for as long as it remains appropriately challenging. Completing fewer controlled sets is a productive starting point. You do not need to earn heavier weights by becoming exhausted first.
Experienced lifters can increase resistance while keeping the same repetitions and schedule. Another option is adding a brief pause at the bottom of the squat or during the row, provided the set still fits comfortably within its round.
Avoid increasing load, repetitions, tempo demands, and training frequency together. If heavier lifting requires longer rest, allow the workout to take longer or complete fewer sets. The thirty-minute limit is a planning tool, not a reason to compromise training quality.
Progressive overload means gradually increasing training demands as your capacity improves. For this workout, start by improving repetition quality and reaching the upper end of the suggested range. Add load only when that work becomes consistently manageable.
Perform the workout twice on nonconsecutive days. Record the weight and repetitions for each exercise. Keep the effort moderate enough to learn the transitions and identify suitable modifications.
Keep the same weights and add one repetition where appropriate, staying within the listed range. You do not have to progress every exercise. Maintain the previous workload for any movement that still challenges your control.
When all three sets reach the top of the range with roughly two or three repetitions remaining, try the next manageable weight. Return to the lower end of the repetition range. If the available weight jump is too large, continue practicing with your current load.
Repeat your successful week-three workload and aim for consistent technique. If fatigue is accumulating, reduce resistance or complete two rounds per block. A lighter week can help you resume training with better energy rather than forcing continuous increases.
Two nonconsecutive sessions per week provide a practical starting schedule. You might train on Monday and Thursday while using other days for comfortable walking, mobility, or activities you enjoy. Consider your entire training week before adding more sessions.
If you already perform demanding leg or upper-body workouts, this routine adds to that workload. Allow recovery time and adjust when soreness, poor sleep, or declining performance affect your movement. Consistency does not require repeating a hard session every day.
The most common mistake is treating the workout as a competition against the clock. Fast transitions can be useful, but rushed lifting makes it harder to control your position. Use the timer to organize work and rest, and let exercise quality determine your repetitions.
Another mistake is choosing one weight for every movement despite clear strength differences. Keep lighter dumbbells available for overhead pressing. Finally, avoid measuring success only through sweat or soreness. Record useful training details so you can recognize progress beyond how tired you feel.
Yes. A short session can support strength development when the exercises provide an appropriate challenge and you repeat them consistently. Progress depends on your starting point, effort, recovery, and how you increase demands over time. Thirty minutes provides a useful training window without guaranteeing a particular result.
Age alone does not determine which variation you should use. Choose weights and movements based on your experience, balance, comfort, and recovery. Supported split squats, chair squats, and incline push-ups offer practical ways to adjust the routine.
Strength training can be one part of a broader fat-loss plan, alongside eating habits, daily movement, and recovery. This workout does not guarantee a calorie deficit or target fat loss from specific body areas. Its clearest purpose is developing strength through repeatable resistance exercise.
Stop an exercise that causes sharp, worsening, or unusual pain. Adjusting the movement may help, but persistent symptoms deserve individual assessment. Muscle effort and fatigue are expected; pain that changes how you move is a reason to pause.
A 30-minute upper-lower superset workout works best when it is simple enough to repeat and challenging enough to support progress. Start with manageable dumbbells, follow the planned recovery, and use each session to practice stronger, more controlled movement. Over time, those consistent sessions create opportunities to lift more confidently and handle a greater workload.
Build on this 30-minute upper-lower superset workout with our 5-Day Upper-Lower Dumbbell Superset Plan for a structured weekly routine, or explore another 30-Minute Full-Body Dumbbell Superset Workout for exercise variety. For more focused sessions, try our 20 Minute Upper Body Dumbbell Superset Workout and 4-Week Progressive Overload Glute Workout. When you are ready to increase the challenge, follow our Progressive Overload Dumbbell Workout Plan for guidance on gradually adjusting your training.
Stay up to date on the latest women’s health, fitness and lifestyle trends and tips.
